
This tutorial will show you how to install a UniFi controller on Ubuntu. First we will configure the firewall using ufw and secure our server before installing UniFi. For this example, we are using Ubuntu 16.04 but there is nothing stopping you from applying it to a newer version.
Before you start, you might want to improve your security by setting up SSH Key-Pair Authentication.
Configure the firewall
First, let’s setup a firewall on our server. We do not want any port open we’re not using as it is a potential security risk.
The port below has nothing to do with UniFi but is required if you want to connect to your server using SSH. If you changed your SSH connection port to something else than the standard 22, change it to the appropriate port.
sudo ufw allow 22/tcp
If you are using OpenSSH, you can also configure the firewall based on the application. To do so, type:
sudo ufw app list
This will show you an output like:
Available applications:
  OpenSSH
This will show a list of all applications for which you can setup ufw. To allow OpenSSH, type:
sudo ufw allow OpenSSH
When successful, you will get the message:
Rules updated
Rules updated (v6)
From here we start adding the required UniFi ports:
sudo ufw allow 8080/tcp
sudo ufw allow 8443/tcp
sudo ufw allow 8880/tcp
sudo ufw allow 8843/tcp
sudo ufw allow 8843/tcp
From version 5.6 you might encounter a STUN Communication Failed warning as shown below:

To fix this, we need to allow UDP on port 3478:
sudo ufw allow 3478/udp
To get an overview of all the allowed ports, try the following command:
sudo ufw show added
The last step is to enable te firewall. To do so, type:
sudo ufw enable
When you get the question “Proceed with operation”, type in y (yes) to continue.
If everything went well, you should see the message:
Firewall is active and enabled on system startup
One last useful command to check the status:
sudo ufw status
Which in our example will lead to the following output:
Status: active

To                    Action          From
--                    ------          ----
OpenSSH               ALLOW           Anywhere
8080/tcp              ALLOW           Anywhere
8443/tcp              ALLOW           Anywhere
8880/tcp              ALLOW           Anywhere
8843/tcp              ALLOW           Anywhere
OpenSSH (v6)          ALLOW           Anywhere (v6)
8080/tcp (v6)         ALLOW           Anywhere (v6)
8443/tcp (v6)         ALLOW           Anywhere (v6)
8880/tcp (v6)         ALLOW           Anywhere (v6)
8843/tcp (v6)         ALLOW           Anywhere (v6)
Install UniFi
Now it’s time to install the UniFi controller.
As some of the information on this tutorial may become obsolete in the future, it’s always a good idea to look at following post on the UBNT Support website for the latest version information.
Create a new repo
To separate our UniFi repository, we are going to create a new repository by typing the following command:
sudo nano -w /etc/apt/sources.list.d/100-ubnt.list
Another way is to edit /etc/apt/sources.list but if you want to make sure you’re not breaking anything, create the new repo file.
Now depending on which version of UniFi you want to install, one of the following URL’s need to be added to the repo file.
If you want to install the latest (non-stable version);
deb http://www.ubnt.com/downloads/unifi/debian testing ubiquiti
If you are going with the stable version:
deb http://www.ubnt.com/downloads/unifi/debian stable ubiquiti
And if you have a production critical machine and don’t want to take any chances, go for the old stable version:
deb http://www.ubnt.com/downloads/unifi/debian oldstable ubiquiti
If you want to know which version will be installed, take a look at the UBNT Support post for the latest information.
When you added the line to the repo file, press CTRL + X to exit the file. You will be asked to “Save modified buffer”, type Y to save your changes and press ENTER.
Add the GPG Keys
Next step is to install the GPG Keys, to do so type the following command:
sudo apt-key adv --keyserver keyserver.ubuntu.com --recv 06E85760C0A52C50
Now let’s update and retrieve the latest package information.
sudo apt-get update
If everything went well, you can now install the UniFi controller by simply typing:
sudo apt-get install unifi
Have some patience while your server is installing the UniFi controller. When done, leave the server some time to start all the necessary programs (2-5 min depending on your server).
Load the Web UI
The UniFi controller is managed using a web interface. Open up your favorite browser and navigate to:
https://[ip address of your server]:8443
During installation, a self-signed certificate is installed. This will cause your browser to show a warning. Just accept the self-signed certificate for now, you can always install a supported certificate later to remove the warning.

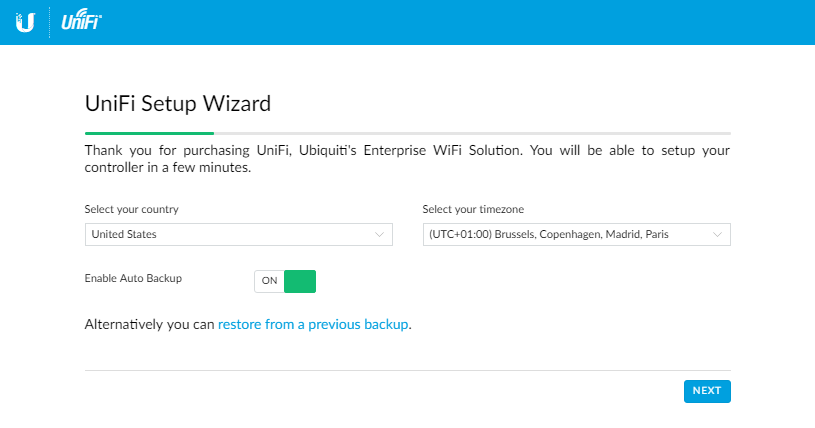
When the page is loaded, follow the wizard and start configuring your UniFi controller.
You can either setup a new instance or restore from a previous backup.
Usefull information
Log files
/usr/lib/unifi/logs/server.log
/usr/lib/unifi/logs/mongod.log
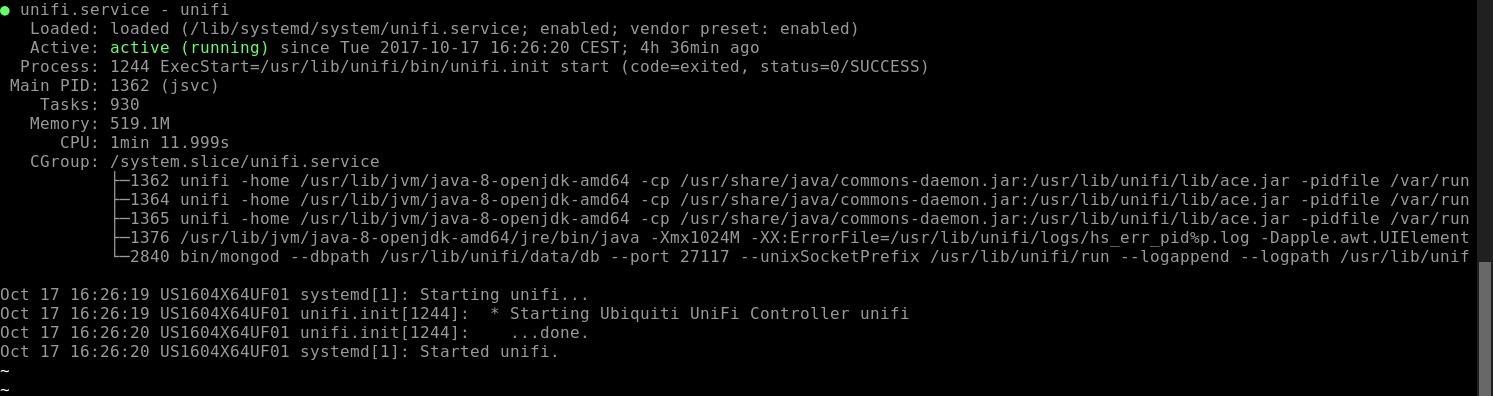
Check if UniFi is running
service unifi status
Install UniFi SSL Certificate on Ubuntu 16.04
If you want to install an SSL certificate for use with the UniFi controller, go to my tutorial for help with the installation.
